
I love to hear my sweet kiddos singing this song. I printed it and put it up in both of their rooms. What better reminder could anyone have? If you would like a copy you can find one here.



I love to hear my sweet kiddos singing this song. I printed it and put it up in both of their rooms. What better reminder could anyone have? If you would like a copy you can find one here.

We love doing photo scavenger hunts and over Spring Break we went on a couple. The kids each took a turn choosing a color or word to look for throughout the day. T chose red and J chose the word ‘the’. As we found the selected color or word around our community the kids took turns taking pictures of the objects. You could also “hunt” for shapes, letters, numbers or words. The kids loved taking the pictures too!

Does it seem like you are bombarded with paper once the school year starts? It does for me. It seems like every year the kids bring home tons (and I do mean tons) of ‘priceless’ memories. I’m pretty sure we’ve cut down our own rain forest with the amount of papers we get each year.
From artwork and school work; to special drawings and creations I find myself in a mound of paperwork. I always feel guilty when I don’t keep every little of piece of school work that comes home (the guilt often comes from the author of the so-called work). So I would usually keep it and put it in a box. Then it would pile up next to other papers until there were MOUNTAINS of school memories.
Last year I decided I had better figure out a better system. So now, at the beginning of each year, the kids each get a binder. They each get to put 25 sheet protectors into their binder.
They each fill out an All About Me page that goes in the first sheet protector. This page is full of favorite facts that always seem to change from one year to the next. These facts include: age, weight, height, who their teacher and friends are, favorite foods, books, songs, color and most importantly what they want to be when they grow up. Then they fill the margins with stickers and sign their name, so cute!
We make handprints and footprints. I also take a picture of each of them or use a recent one. This paper becomes the cover of the binder (I use the ones that have a clear cover so I can slip in a cover sheet). So each year we get new handprints and footprints that have grown bigger since the last year.
Then, throughout the year the kids choose (and they learn pretty fast to be selective since they only have room for 50 pages) what to keep and what to throw away. Once in a while I choose things to keep which I slip in there myself. I try to make sure the papers have a name and date so I can see the growth throughout the year. At the end of the year they get to put their final report card in the pocket at the front of the binder.
It’s fun to see how they change and I love to see the growth they make over the year.
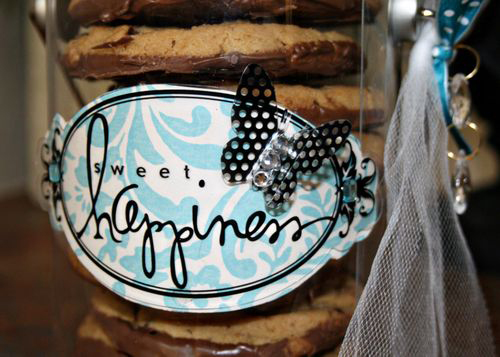
Giant Black Bottom Toffee-Chocolate Chip Cookies
(or to avoid the excessively long name:) Sweet Happiness
Ingredients:
2 cup butter or regular margarine, softened
1½ cup sugar
2 cup packed brown sugar
4 egg
2 tablespoons vanilla
6 cups all purpose flour
1½ teaspoon baking soda
1½ teaspoon salt
1 package (12 ounce size) milk (or semi-sweet) chocolate chunks
1 package (7 1/2 ounce size) toffee bits
Directions:
Heat oven to 350 F. Cream together sugars and butter on a large bowl. Mix in eggs and vanilla. Stir in the flour, baking soda, and the salt. Add chocolate chips and toffee chips and mix well.
Using an ice cream scoop, scoop out leveled dough about 2 inches apart onto ungreased cookie sheet. Bake for 12 to 14 minutes or until the edges are golden brown (the centers will be soft).
Cool for 3 to 4 minutes. Remove from cookie sheet and cool for 15-20 minutes in the refrigerator, this helps the chocolate stick to the cookies easier.
Melt approx. 14 oz of chocolate (I usually use Wilton Candy Melts in Light Cocoa since it’s easy to find) according to package directions. Pour the melted chocolate onto a cookie sheet so that there is a thin layer of chocolate coating the bottom of the pan.  Quickly (the chocolate cools rapidly) remove the cookies from the refrigerator and place each cookie on the cookie sheet of chocolate. Allow the chocolate to cool completely before placing the cookies in a decorated cookie tin (a square of wax paper between each cookie keeps them from sticking).

This was such a fun activity, the kids loved creating their own tiny rock village! We collected varying sizes of river rock, washed them and painted them with acrylic paint.
Mimicking those cute miniature Christmas villages, we had our own little Christmas in July. The kids came up with a city hall, barber shop, skyscraper, post office, candy shoppe, cars, school buses, cozy little homes surrounded by trees, a person and even a stoplight.

I helped them draw the “structures” and they painted them (after the paint dried I went over them with a sharpie to define the buildings).

I helped them draw the “structures” and they painted them (after the paint dried I went over them with a sharpie to define the buildings).

This is the such a yummy recipe. It is so good you’d never guess it was so easy. I don’t even know if the recipe is written down anywhere. My Mom used to make it when we had surprise guests come because it is so quick and it only has 3 ingredients! I love it because I always bake on Sundays….but more often then not I am out of eggs or milk or some other necessary ingredient that I would need from the store (yeah I know, y’all are much better planners than me and would never run out of such necessities, but hey it’s me we’re talking ‘bout here:).
Ingredients:
2 (#2) cans of cherry pie filling
1 yellow cake mix
½-1 stick of melted butter or margarine
Directions:
Preheat oven to 350*. Grease an 8×11 cake pan and pour the cherry pie filling until it covers the bottom of the pan, it will not be very thick. Crumble dry cake mix on top. Melt the butter and pour over the top of the cake mix (not every inch will be covered but you will want most of the top covered with the melted butter). Bake for 20 min or until golden. Serve warm with vanilla ice cream…………yum.
I usually sprinkle crushed pecans on half of the pan, I love it that way, but some people don’t like nuts. So nuts: optional.
I’ve also had it with a can of drained crushed pineapple mixed in with just one can of cherry pie filling, but I’m always out of that too!! Besides this is how my Mom makes it……and I’ve been homesick, so this was Sunday’s dessert.
As T would say, Easy Peasy .

Whenever we have lots of crayons stubs that are too small to use, we gather them up and make crayon cakes. The kids love to do this.
What you’ll need:

Peel off any paper from thecrayons (I use an exacto knife) and break them into 1/2″ to 1″ pieces. This is a great sorting activity for children. They can sort the crayons by color and size. They can even mix the primary colors that will melt to make new colors.
Preheat your oven to 265 degrees F. After allowing the kids to experiment with color and size, arrange two to three like colors in each slot. If you want to add glitter, pour it over the top of each slot full of crayon. Bake for 6-8 minutes (don’t over bake – you want them just melted so you can’t distinguish the crayon shape anymore). Let them cool completely and then they should pop right out
1st Variation: use a shaped silicone muffin tin that’s been lined with tin foil.
2nd Variation: instead of using a muffin tin, use a small paper cups, and microwave them on high for 4 – 6 minutes. Pour the melted wax into candy molds, and freezer for 30 minutes. Once the wax has hardened, your new crayons will pop out of the molds.

They also make great party favors, back to school gifts or gift toppers!
{Mother’s Day Gift Idea}

I love making gifts for Mother’s Day. I don’t know…they just feel more personal or something (although a box of Fannie May chocolates goes a long way with my Mom:). For this Mother’s Day I thought I would make a mini book with the top 5 reasons I love my Mom. I dropped it into a dressed up little box.

Every year when strawberries are in season, I make this layered confection. The combination of almond and strawberries makes this dish refreshing and delicious!
Italian Parfait
1 package (3.4 oz) instant vanilla pudding mix
2 c. milk
¼ tsp almond extract
2 pints strawberries, stemmed and sliced
2 tbsp sugar
1 ½ c crushed vanilla wafers
In a medium bowl, prepare the pudding mix with milk as package directs. Mix in the almond extract; cover and refrigerate. Sweeten strawberries with sugar; spoon about 3 tbsp sweetened berries into each of six stemmed glasses. Layer each with 3 tbsp cookie crumbs and 1/3 c pudding. Top each glass with remaining strawberries and crumbs diving equally. Makes 4 servings.

Kids love experimenting with sand.

Because it is naturally tactile, sand is a perfect way for children explore colors and patterns, of course they don’t care about that, they just want to have fun!

Here is an easy art project the kids love…in the back yard (hint, hint). To introduce the activity we watched this video, she is amazing!!
 Then I let the kids loose to scoop, pour, mix and create. I have bags of colored sand I got from a craft store that we use in our crafts, but you can make your own with beach sand or salt. Below is a simple way to make colored sand.

Colored Sand or Salt
Put 2-3 cups of salt or beach sand into a large zip lock baggie. Add a couple of drops of food coloring (the more food coloring you add the darker and brighter the color gets). Close the baggie and start mixing with your fingers. Shake the sand around until all the sand or salt is colored.